The Ultimate Factory Pattern Blueprint
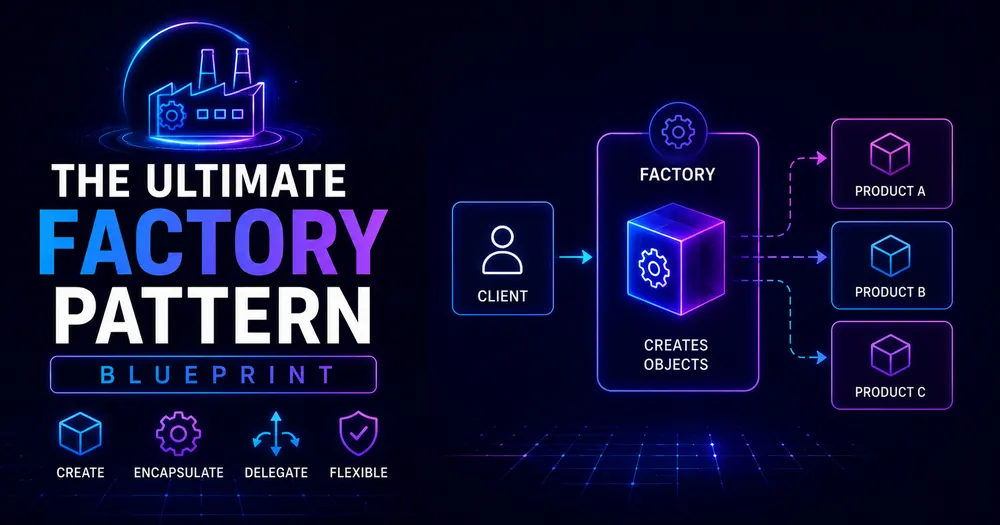
Imagine walking into an actual factory. You don’t need to know how each machine works. you just place your order and receive the finished product. That’s exactly what the Factory Pattern does for your code!
Before diving into the code, you need to understand why elite developers implement this pattern in mission-critical applications:
- Better Flexibility: When your business needs change, you can add new products without changing existing code. This saves time on debugging.
- Good Abstraction: Your code won’t be tied to specific implementations. Your application works with interfaces while the factory handles the details.
- Better Code Organization: Avoid large, hard-to-manage classes. The Factory Pattern separates concerns and makes your code easier to work with.
These are important benefits that can improve your skills as a developer.
5 Steps to Instant Mastery Factory Pattern
Step 1: The Common Problem
First, let’s examine the painful problem the Factory Pattern solves. Imagine we’re building a notification system:
// WITHOUT a Factory (nightmare code!)
class EmailNotification {
  send(to: string, message: string): void {
    console.log(`Sending email to ${to}: ${message}`);
    // Complex email sending logic
  }
}

class SMSNotification {
  send(to: string, message: string): void {
    console.log(`Sending SMS to ${to}: ${message}`);
    // Complex SMS sending logic
  }
}

// This creates TIGHT COUPLING throughout your code!
const notifier = new EmailNotification();
notifier.send("user@example.com", "Important message!");

// What happens when we need to switch to SMS? DISASTER!Every time you need a notification, you’re forced to create the specific type directly. When requirements change (they always do!), you’ll need to modify code throughout your entire application. Pure nightmare!
Step 2: The Powerful Interface That Changes Everything
The secret weapon starts with a simple yet revolutionary interface:
// The game-changing interface
interface Notifier {
  send(to: string, message: string): void;
}

// Concrete implementations
class EmailNotifier implements Notifier {
  send(to: string, message: string): void {
    console.log(`Sending EMAIL to ${to}: ${message}`);
    // Email-specific logic
  }
}

class SMSNotifier implements Notifier {
  send(to: string, message: string): void {
    console.log(`Sending SMS to ${to}: ${message}`);
    // SMS-specific logic
  }
}

class PushNotifier implements Notifier {
  send(to: string, message: string): void {
    console.log(`Sending PUSH to ${to}: ${message}`);
    // Push notification logic
  }
}This interface creates a standard that all notification types must follow.
Step 3: Creating the Factory
Now for the magical part the factory itself:
// The revolutionary Factory class
class NotifierFactory {
  public static createNotifier(type: string): Notifier {
    if (type === "email") {
      return new EmailNotifier();
    } else if (type === "sms") {
      return new SMSNotifier();
    } else if (type === "push") {
      return new PushNotifier();
    } else {
      throw new Error(`Notification type ${type} not supported.`);
    }
  }
}

// How to use our incredible Factory
const emailNotifier = NotifierFactory.createNotifier("email");
emailNotifier.send("user@example.com", "Your account has been created!");

const smsNotifier = NotifierFactory.createNotifier("sms");
smsNotifier.send("+1234567890", "Your verification code is 123456");The factory brilliantly encapsulates all object creation logic in ONE PLACE, making your code infinitely more maintainable!
Step 4: Testing It Works – The Main Benefit
Let’s see the life-changing difference our factory makes:
// Without Factory (BEFORE)
function sendImportantAlert(user) {
  // Direct dependency - TERRIBLE!
  const notifier = new EmailNotifier();
  notifier.send(user.email, "Alert: Your account needs attention!");
}

// With Factory (AFTER)
function sendImportantAlert(user, channel = "email") {
  // Magical flexibility - AMAZING!
  const notifier = NotifierFactory.createNotifier(channel);
  notifier.send(user.contactInfo, "Alert: Your account needs attention!");
}

// Now we can easily switch notification channels!
sendImportantAlert(user, "push"); // Just change one parameter!The result is good. Your code is now adaptable and ready for future changes.
Step 5: Using the Factory Method Pattern – The Next Level
Want to learn more? Here’s the Factory Method pattern a useful next step:
// Abstract creator
abstract class NotificationService {
  // The "factory method"
  protected abstract createNotifier(): Notifier;

  // The template method using our factory method
  public sendNotification(to: string, message: string): void {
    // Get the right notifier
    const notifier = this.createNotifier();

    // Use it
    console.log("Preparing to send notification...");
    notifier.send(to, message);
    console.log("Notification process completed!");
  }
}

// Concrete creators
class EmailNotificationService extends NotificationService {
  protected createNotifier(): Notifier {
    return new EmailNotifier();
  }
}

class SMSNotificationService extends NotificationService {
  protected createNotifier(): Notifier {
    return new SMSNotifier();
  }
}

// Using our advanced pattern
const emailService = new EmailNotificationService();
emailService.sendNotification("user@example.com", "Welcome aboard!");

const smsService = new SMSNotificationService();
smsService.sendNotification("+1234567890", "Your package has shipped!");This advanced pattern adds unbelievable flexibility by letting subclasses decide which objects to create!
A Useful Real-World Example from a Startup
Let’s see a real-world example that demonstrates the true power of the Factory Pattern:
// The foundation interface
interface PaymentProcessor {
  processPayment(amount: number): Promise<PaymentResult>;
}

// Result type
interface PaymentResult {
  success: boolean;
  transactionId?: string;
  error?: string;
}

// Concrete implementations
class StripeProcessor implements PaymentProcessor {
  async processPayment(amount: number): Promise<PaymentResult> {
    console.log(`Processing $${amount} payment with Stripe`);
    // Imagine Stripe API calls here
    return { success: true, transactionId: "stripe_123456" };
  }
}

class PayPalProcessor implements PaymentProcessor {
  async processPayment(amount: number): Promise<PaymentResult> {
    console.log(`Processing $${amount} payment with PayPal`);
    // Imagine PayPal API calls here
    return { success: true, transactionId: "pp_123456" };
  }
}

class BitcoinProcessor implements PaymentProcessor {
  async processPayment(amount: number): Promise<PaymentResult> {
    console.log(`Processing $${amount} payment with Bitcoin`);
    // Imagine Bitcoin processing here
    return { success: true, transactionId: "btc_123456" };
  }
}

// The game-changing factory
class PaymentProcessorFactory {
  public static createPaymentProcessor(method: string): PaymentProcessor {
    switch (method.toLowerCase()) {
      case "stripe":
        return new StripeProcessor();
      case "paypal":
        return new PayPalProcessor();
      case "bitcoin":
        return new BitcoinProcessor();
      default:
        throw new Error(`Payment method ${method} not supported`);
    }
  }
}

// The checkout service that uses our factory
class CheckoutService {
  async processOrder(order: any, paymentMethod: string): Promise<PaymentResult> {
    try {
      const processor = PaymentProcessorFactory.createPaymentProcessor(paymentMethod);

      // Calculate total
      const total = order.items.reduce((sum: number, item: any) => sum + item.price, 0);

      // Process payment using the correct processor
      const result = await processor.processPayment(total);

      if (result.success) {
        console.log(`Order completed! Transaction ID: ${result.transactionId}`);
      }

      return result;
    } catch (error) {
      console.error("Payment processing failed:", error);
      return { success: false, error: error.message };
    }
  }
}

// Using our amazing system
const checkout = new CheckoutService();
const order = { items: [{ name: "Product 1", price: 50 }, { name: "Product 2", price: 30 }] };

// The magic of flexibility
checkout.processOrder(order, "paypal");
// Later, we can easily switch payment methods
checkout.processOrder(order, "bitcoin");This implementation lets you add new payment methods easily. Just create a new processor class and add one line to the factory. You won’t need to change the checkout service.
The 5 Burning Questions About Factory Pattern That Every Developer Secretly Wants Answered
When should I absolutely use a Factory Pattern?
The Factory Pattern becomes essential when:
- You don’t know exactly which concrete classes your code will need to work with
- You want to shield your code from messy object creation logic
- Your system needs to work with multiple product families
- You expect to add new product types frequently
- Unit testing would benefit from substituting product implementations
Is the Factory Pattern overkill for small applications?
One important point: For very small applications with few objects that don’t change, a simple factory may be too much. But applications tend to grow, and adding a factory later is harder than starting with one.
What’s the difference between Simple Factory, Factory Method, and Abstract Factory?
The explosive differences are:
- Simple Factory: A single class responsible for creating objects (what we showed first)
- Factory Method: A method in a superclass that lets subclasses decide what to create (our advanced example)
- Abstract Factory: A family of factory methods for creating entire families of related objects
Can Factories be used with dependency injection?
Yes. Many dependency injection frameworks use factories. This combination makes your application more robust.
Conclusion
The Factory Pattern is a useful design pattern that improves how you create objects. After you learn it, you’ll have a better approach to structuring your code.
Let’s review the main benefits:
- Your code becomes dramatically more flexible and adaptable
- You can add new implementations without modifying existing code
- Testing becomes effortless through easy implementation swapping
- Complex creation logic gets hidden behind simple interfaces
- Your architecture becomes more modular and professional
The most important benefit is that the Factory Pattern helps you think in terms of abstraction. You’ll focus on interfaces and relationships instead of specific implementations. This is a valuable skill for developers.
So what are you waiting for? Try implementing a factory in your next project. It can improve your code quality and maintainability, and add to your skills as a developer.
📚 READ NEXT
→ Adapter Pattern — make incompatible systems work together
→ Mastering TypeScript Generics — write more flexible, reusable code