
How to Master the Adapter Pattern for Solving Integration Problems
Introduction
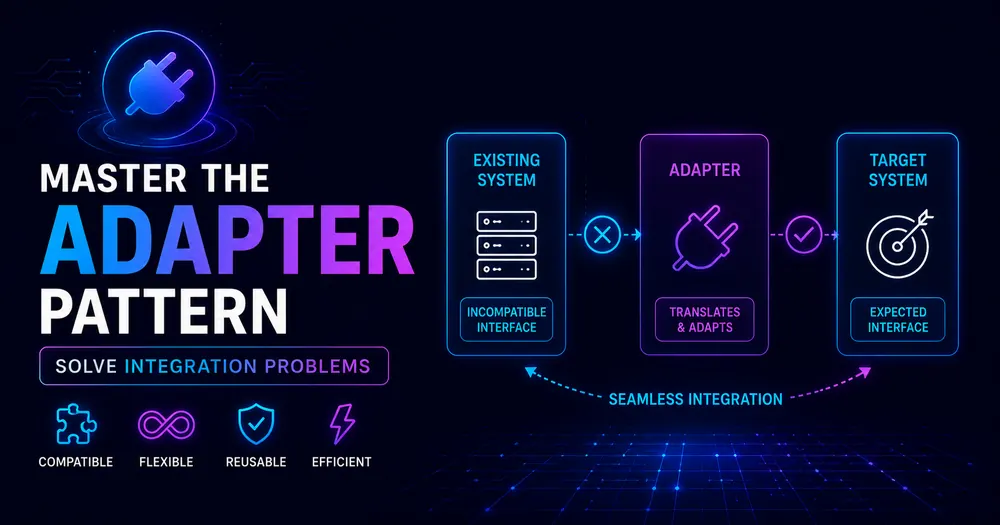
The Adapter Pattern lets classes work together that couldn’t otherwise because of incompatible interfaces. It acts as a bridge between two incompatible interfaces by wrapping an instance of one class with a new adapter class that presents the expected interface.
The Adapter Pattern has saved projects from these headaches more times than I can count. It’s simple, practical, and solves real integration problems.
The Core Problem It Solves
The Adapter Pattern fixes one fundamental issue: connecting systems with incompatible interfaces.
Think of it like you have a new device with a USB-C port, but your old cable has a USB-A plug. You need an adapter to make them work together. The Adapter Pattern works the same way in code.
This pattern lets classes with different interfaces work together. It wraps an existing class with a new interface so other classes can use it without changing their code.
Key Benefits Of Adapter Pattern
- Integration Connect systems that weren’t designed to work together
- Code Reuse Use existing classes even when interfaces don’t match
- Separation Keep client code clean and separate from adaptation logic
- Legacy Support Integrate legacy code with modern systems
- Testing Replace real services with test adapters for better unit tests
These benefits make the Adapter Pattern essential for complex systems and evolving codebases.
How It Works in Plain Terms
Here’s the pattern stripped down to basics:
- You have a Client that expects a specific interface
- You have an Adaptee with a different interface
- You create an Adapter that:
- Implements the interface the client expects
- Wraps the adaptee
- Translates between the two interfaces
That’s it. The adapter acts as a translator between incompatible interfaces.
Clean Example
Let’s look at a basic implementation. Imagine we have a modern payment system, but we need to integrate with a legacy payment processor:
// The interface our client code expects
interface ModernPaymentProcessor {
  processPayment(paymentDetails: {
    amount: number;
    cardNumber: string;
    expiryDate: string;
    cvv: string;
  }): PaymentResult;
}

// The result type
interface PaymentResult {
  success: boolean;
  transactionId?: string;
  errorMessage?: string;
}

// The legacy system we need to work with
class LegacyPaymentSystem {
  makePayment(amount: number, cardNo: string, expiry: string, secCode: string): boolean {
    console.log(`Processing payment of ${amount} with legacy system`);
    // Legacy payment processing logic
    return true; // Payment successful
  }

  getTransactionId(): string {
    return `legacy_${Date.now()}`;
  }
}

// Our adapter that makes the legacy system work with our modern interface
class LegacyPaymentAdapter implements ModernPaymentProcessor {
  private legacySystem: LegacyPaymentSystem;

  constructor(legacySystem: LegacyPaymentSystem) {
    this.legacySystem = legacySystem;
  }

  processPayment(paymentDetails: {
    amount: number;
    cardNumber: string;
    expiryDate: string;
    cvv: string;
  }): PaymentResult {
    try {
      // Adapt the parameters to match the legacy system
      const success = this.legacySystem.makePayment(
        paymentDetails.amount,
        paymentDetails.cardNumber,
        paymentDetails.expiryDate,
        paymentDetails.cvv
      );

      if (success) {
        // Get the transaction ID from the legacy system
        const transactionId = this.legacySystem.getTransactionId();
        return { success: true, transactionId };
      } else {
        return { success: false, errorMessage: "Payment failed in legacy system" };
      }
    } catch (error) {
      return { success: false, errorMessage: error.message };
    }
  }
}

// Client code that uses the modern interface
class PaymentService {
  private paymentProcessor: ModernPaymentProcessor;

  constructor(paymentProcessor: ModernPaymentProcessor) {
    this.paymentProcessor = paymentProcessor;
  }

  makePayment(amount: number, cardDetails: {
    cardNumber: string;
    expiryDate: string;
    cvv: string;
  }): PaymentResult {
    console.log(`Payment service processing $${amount}`);

    return this.paymentProcessor.processPayment({
      amount,
      ...cardDetails
    });
  }
}

// Using our adapter
const legacySystem = new LegacyPaymentSystem();
const adapter = new LegacyPaymentAdapter(legacySystem);
const paymentService = new PaymentService(adapter);

// Process a payment using the modern interface
// but it's actually using the legacy system behind the scenes
const result = paymentService.makePayment(99.99, {
  cardNumber: "4111111111111111",
  expiryDate: "12/25",
  cvv: "123"
});

console.log("Payment result:", result);This example shows how we adapt a legacy payment system to work with our modern payment interface. The client code never needs to know it’s talking to a legacy system.
Object Adapters vs. Class Adapters
There are two main types of adapters
Object Adapter uses composition (has-a relationship). It’s useful for most situations, especially when you can’t modify the adaptee.
Class Adapter uses inheritance (is-a relationship). Use it when you need to override some adaptee behavior.
The example above uses an Object Adapter. Here’s what a Class Adapter might look like:
// Class adapter (requires multiple inheritance, which TypeScript doesn't support)
// But we can simulate it with interfaces
class PaymentClassAdapter extends LegacyPaymentSystem implements ModernPaymentProcessor {
  processPayment(paymentDetails: {
    amount: number;
    cardNumber: string;
    expiryDate: string;
    cvv: string;
  }): PaymentResult {
    try {
      // We directly call our own inherited methods
      const success = this.makePayment(
        paymentDetails.amount,
        paymentDetails.cardNumber,
        paymentDetails.expiryDate,
        paymentDetails.cvv
      );

      if (success) {
        const transactionId = this.getTransactionId();
        return { success: true, transactionId };
      } else {
        return { success: false, errorMessage: "Payment failed in legacy system" };
      }
    } catch (error) {
      return { success: false, errorMessage: error.message };
    }
  }
}Real-World Implementation
Let’s look at a practical example from a production system. Imagine integrating different third-party data providers into a standardized analytics system:
// Our standardized analytics interface
interface AnalyticsProvider {
  trackEvent(name: string, properties?: Record<string, any>): void;
  trackPageView(pageName: string, pageUrl: string): void;
  identifyUser(userId: string, traits?: Record<string, any>): void;
}

// Google Analytics provider (simplified)
class GoogleAnalytics {
  sendEvent(eventName: string, params: Record<string, any>): void {
    console.log(`GA: Event ${eventName} with params:`, params);
    // Google Analytics specific code
  }

  sendPageView(url: string, title?: string): void {
    console.log(`GA: Pageview of ${url} with title: ${title || 'Untitled'}`);
    // Google Analytics specific code
  }

  setUser(id: string): void {
    console.log(`GA: Setting user ID: ${id}`);
    // Google Analytics specific code
  }

  setUserProperty(name: string, value: any): void {
    console.log(`GA: Setting user property ${name} to ${value}`);
    // Google Analytics specific code
  }
}

// Mixpanel provider (simplified)
class Mixpanel {
  track(event: string, properties: Record<string, any>): void {
    console.log(`Mixpanel: Tracking ${event}:`, properties);
    // Mixpanel specific code
  }

  page(pageName: string): void {
    console.log(`Mixpanel: Page view of ${pageName}`);
    // Mixpanel specific code
  }

  identify(userId: string): void {
    console.log(`Mixpanel: Identifying user ${userId}`);
    // Mixpanel specific code
  }

  people_set(properties: Record<string, any>): void {
    console.log(`Mixpanel: Setting user properties:`, properties);
    // Mixpanel specific code
  }
}

// Adapter for Google Analytics
class GoogleAnalyticsAdapter implements AnalyticsProvider {
  private ga: GoogleAnalytics;

  constructor(ga: GoogleAnalytics) {
    this.ga = ga;
  }

  trackEvent(name: string, properties: Record<string, any> = {}): void {
    this.ga.sendEvent(name, properties);
  }

  trackPageView(pageName: string, pageUrl: string): void {
    this.ga.sendPageView(pageUrl, pageName);
  }

  identifyUser(userId: string, traits: Record<string, any> = {}): void {
    this.ga.setUser(userId);

    // Set each trait as a user property
    Object.entries(traits).forEach(([key, value]) => {
      this.ga.setUserProperty(key, value);
    });
  }
}

// Adapter for Mixpanel
class MixpanelAdapter implements AnalyticsProvider {
  private mp: Mixpanel;

  constructor(mp: Mixpanel) {
    this.mp = mp;
  }

  trackEvent(name: string, properties: Record<string, any> = {}): void {
    this.mp.track(name, properties);
  }

  trackPageView(pageName: string, pageUrl: string): void {
    this.mp.page(pageName);

    // Also track as an event with the URL
    this.mp.track('page_view', { name: pageName, url: pageUrl });
  }

  identifyUser(userId: string, traits: Record<string, any> = {}): void {
    this.mp.identify(userId);

    if (Object.keys(traits).length > 0) {
      this.mp.people_set(traits);
    }
  }
}

// Analytics manager that uses a standardized interface
class AnalyticsManager {
  private providers: AnalyticsProvider[] = [];

  addProvider(provider: AnalyticsProvider): void {
    this.providers.push(provider);
  }

  trackEvent(name: string, properties?: Record<string, any>): void {
    this.providers.forEach(provider => provider.trackEvent(name, properties));
  }

  trackPageView(pageName: string, pageUrl: string): void {
    this.providers.forEach(provider => provider.trackPageView(pageName, pageUrl));
  }

  identifyUser(userId: string, traits?: Record<string, any>): void {
    this.providers.forEach(provider => provider.identifyUser(userId, traits));
  }
}

// Using the adapters
const gaAdapter = new GoogleAnalyticsAdapter(new GoogleAnalytics());
const mpAdapter = new MixpanelAdapter(new Mixpanel());

const analytics = new AnalyticsManager();
analytics.addProvider(gaAdapter);
analytics.addProvider(mpAdapter);

// Now we can track events across multiple platforms with one call
analytics.identifyUser("user-123", { name: "John Doe", plan: "premium" });
analytics.trackPageView("Home Page", "https://example.com/");
analytics.trackEvent("button_click", { buttonId: "signup", location: "header" });The Example above shows how to:
- Add or remove analytics providers without changing application code
- Have a single, consistent API for all analytics operations
- Translate between our domain-specific event model and each provider’s requirements
- Easily test our analytics logic with mock adapters
Adapter Pattern Best Practices
Follow these best practices for clean, maintainable adapter implementations:
- Keep adapters simple: The adapter should only translate between interfaces, not add business logic.
- Follow interface segregation: Create smaller, focused interfaces to minimize adapter complexity.
- Use composition over inheritance: Prefer object adapters (composition) over class adapters (inheritance).
- Document the mapping: Make it clear how the adapter maps between interfaces.
- Handle errors appropriately: Translate exceptions from the adaptee to match the client’s expectations.
- Write thorough tests: Ensure the adapter correctly translates all aspects of the interface.
- Consider bidirectional adapters: When both systems need to interact, create adapters in both directions.
- Look for adapter opportunities during integration: Whenever connecting disparate systems, consider if adapters would help.
Code example of a well-designed adapter following these practices:
/**
 * Adapter for ThirdPartyPaymentProcessor to work with our PaymentGateway interface.
 * Maps between our payment model and the third-party system's model.
 */
class ThirdPartyPaymentAdapter implements PaymentGateway {
  private thirdPartyProcessor: ThirdPartyPaymentProcessor;

  constructor(thirdPartyProcessor: ThirdPartyPaymentProcessor) {
    this.thirdPartyProcessor = thirdPartyProcessor;
  }

  /**
   * Process a payment through the third-party system.
   * @param payment Our payment details
   * @returns A standardized payment result
   */
  async processPayment(payment: PaymentDetails): Promise<PaymentResult> {
    try {
      // Map our payment model to their payment model
      const thirdPartyPaymentRequest = this.mapToThirdPartyRequest(payment);

      // Process the payment using their API
      const thirdPartyResult = await this.thirdPartyProcessor.chargePayment(thirdPartyPaymentRequest);

      // Map their response back to our model
      return this.mapFromThirdPartyResponse(thirdPartyResult);
    } catch (error) {
      // Translate their exceptions to our error model
      return {
        success: false,
        errorCode: this.mapErrorCode(error),
        errorMessage: error.message || 'Payment processing failed'
      };
    }
  }

  /**
   * Maps our payment details to their request format
   */
  private mapToThirdPartyRequest(payment: PaymentDetails): ThirdPartyPaymentRequest {
    return {
      amount: payment.amount.toString(),
      currency: payment.currency,
      card: {
        number: payment.cardNumber,
        expiry: `${payment.expiryMonth}/${payment.expiryYear}`,
        cvc: payment.cvv,
        name: payment.cardholderName
      },
      description: payment.description || ''
    };
  }

  /**
   * Maps their response to our result format
   */
  private mapFromThirdPartyResponse(response: ThirdPartyPaymentResponse): PaymentResult {
    return {
      success: response.status === 'SUCCESS',
      transactionId: response.id,
      amount: parseFloat(response.amount),
      timestamp: new Date(response.timestamp)
    };
  }

  /**
   * Maps their error codes to our standardized codes
   */
  private mapErrorCode(error: any): string {
    const errorCode = error.code || 'UNKNOWN';
    const errorMap: Record<string, string> = {
      'INVALID_CARD': 'PAYMENT_METHOD_INVALID',
      'INSUFFICIENT_FUNDS': 'INSUFFICIENT_FUNDS',
      'PROCESSING_ERROR': 'PROCESSOR_ERROR',
      // Map other error codes...
    };

    return errorMap[errorCode] || 'UNKNOWN_ERROR';
  }
}Conclusion
After implementing the Adapter Pattern in countless projects, I’m convinced it’s one of the most practical and immediately useful design patterns.
The Adapter Pattern directly addresses the reality of software development: we’re constantly integrating systems that weren’t designed to work together. Whether connecting to third-party APIs, working with legacy code, or building systems with evolving interfaces, the Adapter Pattern provides a clean, maintainable solution.
- It solves real integration problems: The Adapter Pattern addresses all developers’ everyday challenges.
- It improves code organization: By separating interface adaptation from business logic, your code becomes more modular and easier to understand.
- It reduces technical debt: Instead of writing complex, tightly-coupled integration code, adapters provide a clean separation of concerns.
- It future-proofs your systems: When external interfaces change, you only need to update the adapter, not your client code.
- It works well with other patterns: As we’ve seen, Adapter combines effectively with Facade, Decorator, and other structural patterns.
Master the Adapter Pattern, and you’ll have a powerful tool for handling integration challenges elegantly and simply. Your future self (and teammates) will thank you when requirements change and they always do.
📚 READ NEXT
→ Facade Pattern — simplify complex subsystems
→ Mastering TypeScript Generics — write more flexible, reusable code