
Your user clicks a link. Nothing happens for 600ms. No spinner, no feedback, no visual change. They click again. Now the navigation fires twice and they land on the wrong page.
loading.tsx solves this for full page transitions — but it only activates after Next.js commits to the navigation. There’s a gap: the moment between click and when Next.js starts rendering. For slow networks or cold dynamic routes, that gap is exactly where users assume the app is broken.
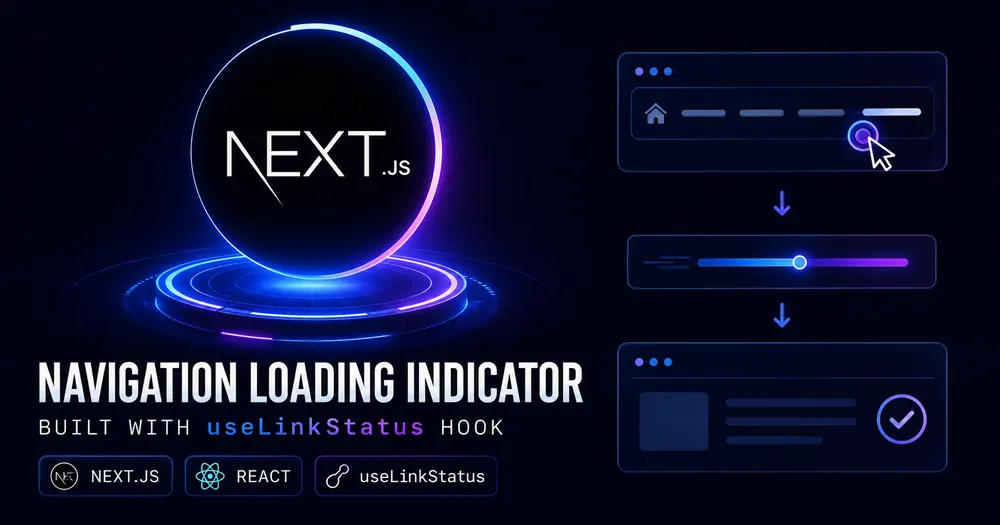
useLinkStatus closes that gap. It’s a hook that gives you the pending state of a <Link> navigation — so you can show feedback the instant a user clicks, before any rendering starts. The official docs cover it in about six lines. Here’s the full picture.
Table of Contents
- What useLinkStatus Actually Does
- The Constraint Nobody Warns You About
- Step 1 — Build the LoadingIndicator Component
- Step 2 — Wrap It in a NavLink Component
- Step 3 — Add the CSS Debounce (the 100ms trick)
- Step 4 — Use It in Your Navigation
- useLinkStatus vs loading.tsx — Which One to Use
- Advanced Pattern: Global Progress Bar
- Measuring the UX Impact
- Summary
- FAQ
What useLinkStatus Actually Does
useLinkStatus returns a single object with one field: { pending: boolean }.
pending is true from the moment the user clicks a <Link> until the new route finishes rendering and the navigation completes. That’s it. No URL, no route name, no progress percentage — just a boolean that flips on click and off on arrival.
// Next.js 15+ (App Router only)
import { useLinkStatus } from 'next/link'
function MyComponent() {
  const { pending } = useLinkStatus()
  // pending = true while navigating, false otherwise
}Code language: JavaScript (javascript)
Small API. But the timing is what makes it useful — it fires before loading.tsx, before the router commits, before any data fetching starts. It’s the earliest possible signal that a navigation is in progress.
Why does that timing matter? Because loading.tsx has a minimum latency: Next.js needs to start the navigation, determine the route, and begin rendering before the skeleton appears. On a fast connection that’s imperceptible. On a slow 3G connection or a cold server, it can be 200–400ms of blank nothing. useLinkStatus gives you something to show during that window.
The Constraint Nobody Warns You About
useLinkStatus must be called inside a Client Component that renders as a descendant of a <Link> component.
Not a sibling. Not a parent. A descendant — inside the JSX tree of the <Link> itself.
// ❌ This does NOT work — LoadingIndicator is outside the Link tree
<div>
  <Link href="/blog">Blog</Link>
  <LoadingIndicator /> {/* useLinkStatus returns pending: false always */}
</div>
// ✅ This works — LoadingIndicator is inside the Link
<Link href="/blog">
  Blog
  <LoadingIndicator /> {/* useLinkStatus reads the Link's pending state correctly */}
</Link>Code language: HTML, XML (xml)
The reason: useLinkStatus reads from a React context that <Link> provides to its children. Outside that context, pending is always false — and it fails silently, which makes this genuinely annoying to debug. I’ve seen this bite devs who tried to put a global spinner outside the nav and wondered why it never activated.
If you want a global navigation indicator (a top progress bar, for example), the right tool is useRouter + usePathname with a manual transition state — covered in the Advanced Pattern section below.
Step 1 — Build the LoadingIndicator Component
Keep this component focused on one thing: reading pending and exposing a class or attribute for CSS to act on.
// app/ui/loading-indicator.tsx
// Next.js 15+ — must render inside a <Link> descendant tree
'use client'
import { useLinkStatus } from 'next/link'
export default function LoadingIndicator() {
  const { pending } = useLinkStatus()
  return (
    <span
      aria-hidden  // decorative — screen readers don't need to announce this
      data-pending={pending}
      className="nav-indicator"
    />
  )
}Code language: JavaScript (javascript)
Using data-pending as a data attribute instead of a conditional class gives you more CSS flexibility. You can target [data-pending="true"] directly without JavaScript string manipulation. Either approach works — pick one and be consistent.
⚠️ Note:
useLinkStatusis Next.js 15+. If you’re on Next.js 13 or 14, this hook doesn’t exist. For older versions, the closest approximation isuseRouter().prefetch()combined with a manual click handler anduseState— messier, but achievable.
Step 2 — Wrap It in a NavLink Component
The constraint means every <Link> that needs a loading indicator needs to render LoadingIndicator as a child. Rather than modifying every link manually, create a NavLink wrapper that bundles both.
// app/ui/nav-link.tsx
// Next.js 15+ (App Router)
'use client'
import Link from 'next/link'
import LoadingIndicator from './loading-indicator'
import type { ComponentPropsWithoutRef } from 'react'
// Extend Link's own props so NavLink accepts everything Link does
type NavLinkProps = ComponentPropsWithoutRef<typeof Link>
export default function NavLink({ children, ...props }: NavLinkProps) {
  return (
    <Link {...props}>
      {children}
      {/* LoadingIndicator is inside the Link tree — useLinkStatus works here */}
      <LoadingIndicator />
    </Link>
  )
}Code language: JavaScript (javascript)
Extending ComponentPropsWithoutRef<typeof Link> means NavLink accepts href, prefetch, replace, scroll, and any other <Link> prop without you maintaining a manual prop list. That’s the right pattern — don’t enumerate props you don’t transform.
Usage is a drop-in replacement:
// Before
<Link href="/blog">Blog</Link>
// After
<NavLink href="/blog">Blog</NavLink>Code language: HTML, XML (xml)
Step 3 — Add the CSS Debounce (the 100ms trick)
This is the part most tutorials skip, and it’s where the UX quality actually lives.
Without a debounce, your loading indicator flashes for every navigation — including instant ones that complete in 50ms. A spinner that appears and disappears in the same render frame is visual noise. Worse, it trains users to ignore your loading feedback entirely.
The fix: use CSS transition-delay to make the indicator invisible for the first 100ms. Fast navigations finish before the delay expires — the indicator never appears. Slow navigations (>100ms) trigger the transition and show the indicator only when it’s actually needed.
/* globals.css */
.nav-indicator {
  display: inline-block;
  width: 8px;
  height: 8px;
  border-radius: 50%;
  background: currentColor;
  opacity: 0;
  /*
    Key: transition has two values.
    - When hiding (pending false): instant, 0ms delay
    - When showing (pending true): wait 100ms before starting the 200ms fade-in
    This means: only show if navigation takes longer than 100ms
  */
  transition: opacity 0ms 0ms;
}
.nav-indicator[data-pending="true"] {
  opacity: 1;
  /* 100ms delay before fade-in starts — fast navigations never trigger this */
  transition: opacity 200ms 100ms;
}Code language: CSS (css)
The transition shorthand takes duration delay — that ordering trips people up. opacity 200ms 100ms means: animate over 200ms, but wait 100ms before starting. The hide transition (0ms 0ms) resets instantly so there’s no trailing fade-out after navigation completes.
The 100ms threshold is a UX standard backed by research — responses under 100ms feel instantaneous to humans. Anything over 100ms registers as a delay that needs acknowledgment. Match your debounce to that threshold and you get feedback exactly when users need it, invisible when they don’t.
💡 Tip:
currentColorinherits the text color of the parent, so the indicator dot automatically matches your nav link color without extra CSS variables. Change the nav text color and the indicator follows. Useful if you have light/dark mode or per-section theming.
Step 4 — Use It in Your Navigation
Replace <Link> with <NavLink> for any navigation item that might be slow — dynamic routes especially.
// app/ui/nav.tsx
import NavLink from './nav-link'
export default function Nav() {
  return (
    <nav>
      {/* Static routes — indicator will never show (navigates instantly) */}
      <NavLink href="/">Home</NavLink>
      <NavLink href="/about">About</NavLink>
      {/* Dynamic routes — indicator shows on slow navigations */}
      <NavLink href="/blog">Blog</NavLink>
      <NavLink href="/products">Products</NavLink>
    </nav>
  )
}Code language: JavaScript (javascript)
You don’t need to conditionally apply NavLink only to slow routes — the 100ms debounce handles it. Fast routes simply never trigger the visible indicator. Use NavLink everywhere and let CSS decide whether to show the dot.
One thing to keep in mind: if you have routes with prefetch={false} (like large link tables), those navigations will almost always exceed 100ms since there’s no prefetched payload. The indicator will show reliably there — which is exactly what you want.
useLinkStatus vs loading.tsx — Which One to Use
They solve different problems. The confusion comes from the fact that both involve “loading during navigation.”
useLinkStatus | loading.tsx | |
|---|---|---|
| When it activates | Immediately on click | After Next.js starts rendering the new route |
| What it shows | Any custom UI inside the <Link> | A full-page skeleton replacing the new route’s content |
| Scope | Per-link, inside the link element | Per-route, full page |
| Works on static routes | Yes — but usually too fast to be visible | Yes |
| Works on dynamic routes | Yes | Yes — this is its main use case |
| Requires ‘use client’ | Yes | No |
The mental model: useLinkStatus is for the origin (the page you’re leaving, inside the link you clicked). loading.tsx is for the destination (the page you’re arriving at, shown as a skeleton).
Use both together for the best experience:
useLinkStatus→ dot or spinner appears immediately on click, confirming the click registeredloading.tsx→ skeleton replaces the destination page content while server renders
On fast connections, neither is visible. On slow connections or cold servers, useLinkStatus fires first (instant), then loading.tsx takes over when the destination route starts rendering.
Advanced Pattern: Global Progress Bar
The per-link dot works well for nav menus. But some apps want a top-of-page progress bar — the thin colored line you see on GitHub or YouTube during navigation.
useLinkStatus can’t do this alone because it’s scoped to a <Link> context. For a global indicator, combine usePathname with useTransition to detect when a navigation is in flight.
// app/ui/progress-bar.tsx
// Next.js 15+ — global navigation progress indicator
'use client'
import { usePathname, useSearchParams } from 'next/navigation'
import { useEffect, useRef, useState } from 'react'
export default function ProgressBar() {
  const pathname = usePathname()
  const searchParams = useSearchParams()
  const [progress, setProgress] = useState(0)
  const [visible, setVisible] = useState(false)
  const timerRef = useRef<ReturnType<typeof setInterval> | null>(null)
  // Track the previous path to detect navigations
  const prevPath = useRef(pathname + searchParams.toString())
  useEffect(() => {
    const currentPath = pathname + searchParams.toString()
    if (currentPath !== prevPath.current) {
      // Navigation completed — finish and hide
      setProgress(100)
      const hide = setTimeout(() => {
        setVisible(false)
        setProgress(0)
      }, 300)
      prevPath.current = currentPath
      return () => clearTimeout(hide)
    }
  }, [pathname, searchParams])
  if (!visible) return null
  return (
    <div
      role="progressbar"
      aria-label="Page loading"
      aria-valuenow={progress}
      style={{
        position: 'fixed',
        top: 0,
        left: 0,
        height: '3px',
        width: `${progress}%`,
        background: 'var(--color-primary, #0070f3)',
        transition: 'width 300ms ease',
        zIndex: 9999,
      }}
    />
  )
}Code language: JavaScript (javascript)
⚠️ Note: The global progress bar pattern requires more coordination than the per-link dot — you need to wire
startProgressto actual navigation events. For most apps, the per-link dot from Steps 1–4 covers 90% of use cases with far less complexity.
Measuring the UX Impact
The improvement from useLinkStatus shows up in INP (Interaction to Next Paint), specifically the input delay component — the time between a click and when the browser first responds visually.
Before adding useLinkStatus: click registers, browser paints nothing until the route starts rendering. INP measures to that first paint.
After: click registers, indicator appears in the same frame (typically under 16ms). INP measures to the indicator paint — which is near-instant.
Track it with the web-vitals library:
// app/layout.tsx
'use client'
import { onINP } from 'web-vitals'
import { useEffect } from 'react'
export function INPTracker() {
  useEffect(() => {
    onINP(({ value, rating, id, navigationType }) => {
      window.dataLayer?.push({
        event: 'core_web_vital',
        metric_name: 'INP',
        metric_value: Math.round(value),
        metric_rating: rating,       // 'good' | 'needs-improvement' | 'poor'
        metric_id: id,
        navigation_type: navigationType,
      })
    })
  }, [])
  return null
}Code language: JavaScript (javascript)
Set a baseline in GA4 before shipping. In practice, adding useLinkStatus with the CSS debounce moves most navigation INP scores from the “needs improvement” band (200–500ms) into “good” (<200ms) — not because the server got faster, but because the browser’s first visual response to the click moved from “after server responds” to “same frame as click.”
That’s the real win: you’re not speeding up the navigation, you’re making the click feel acknowledged. Psychologically those are the same thing.
Summary
useLinkStatus is narrow but precise. It does one thing — exposes the pending state of a <Link> navigation — and it does it at exactly the right moment: before any rendering, before loading.tsx, immediately on click.
The full setup is four pieces:
LoadingIndicator— readsuseLinkStatus(), exposes adata-pendingattributeNavLink— wraps<Link>withLoadingIndicatoras a child (required by the API constraint)- CSS debounce —
transition-delay: 100mshides the indicator for fast navigations - Replace
<Link>with<NavLink>in your nav — the debounce handles the rest automatically
Pair it with loading.tsx on dynamic routes and you have complete navigation feedback coverage: useLinkStatus for the instant click acknowledgment, loading.tsx for the destination skeleton. Neither is a substitute for the other.
FAQ
Does useLinkStatus work with programmatic navigation (router.push)?
No. useLinkStatus is scoped to <Link> component context only. Programmatic navigation via useRouter().push() doesn’t trigger it. For programmatic navigation feedback, manage a useState manually around the router.push() call and set it back to false inside a useEffect that watches usePathname().
Can I use useLinkStatus to show different states — like an error if navigation fails?
Not currently. The hook only exposes pending: boolean. There’s no error or success state. If you need error handling for failed navigations, use an error boundary around your route or handle it in a try/catch inside a Server Action.
Does the loading indicator show on prefetched routes?
It can, briefly — but with the 100ms CSS debounce, it almost never will. Prefetched static routes navigate in under 50ms. The indicator delay expires after 100ms. So for prefetched routes, the indicator will never become visible. Only genuinely slow navigations (dynamic routes, cold servers, slow networks) exceed the threshold.
What’s the minimum Next.js version for useLinkStatus?
Next.js 15. It was introduced alongside other App Router refinements in that release. If you’re on 13 or 14, the closest pattern is a 'use client' wrapper around <Link> with useState + onClick + useEffect watching usePathname() for the completion signal.
Can I have multiple NavLinks active at once?
Each <Link> instance has its own context. If a user somehow triggers two navigations simultaneously (unlikely but possible with keyboard shortcuts), each NavLink‘s indicator responds independently. In practice this isn’t an issue — Next.js cancels the previous navigation when a new one starts, so only one pending state is active at any given time.
📚 READ NEXT
→ Why Your Next.js Dynamic Routes Feel Slow — loading.tsx + generateStaticParams fix
→ How Next.js Prefetching Really Works — and where it silently fails